View our Pricing & Plans for a detailed list and comparison of features available in each plan.
In Docubee, e-signature is offered as Quick Sign. The Quick Sign (QS) feature does much more than enabling you to quickly set up a document for getting eSignatures. It can:
 The template will be saved to your Docubee Document library.
 Reassign - Reassign this document to another recipient,
Resend Email - Resend the email for the current recipient, and/or
Generate Link - Generate a link and send it to a recipient if they are having trouble accessing their email. To generate a link:
Reassign - Reassign this document to another recipient,
Resend Email - Resend the email for the current recipient, and/or
Generate Link - Generate a link and send it to a recipient if they are having trouble accessing their email. To generate a link:
 Example filter by status of ‘in-progress’ and document template for ‘sample-doc’:

 See the FAQ.
- Collect your eSignatures with or without an audit trail. Docubee’s audit trails archives when and where a document was signed, and by whom.
- Create a password when preparing your document, and the signer will have to enter the password to access and sign the document. This is a great way to add an extra layer of security to any documents sent. (Contact us for more information.)
- Require SMS 2FA from signers.
- Extend the compliance of Docubee’s legally-binding eSignatures with the ability to request location data from signers’ web browsers when they complete an eSignature task. So, we’ve added geolocation, tamper-proof documents, and encryption at rest and in transit. (Contact us for more information.)
Notes:
- Integrate with our APIs or integrate our APIs into your actual application to allow sending documents in bulk, collecting legally binding e-signatures, tracking where those documents are in the process and routing them to their storage.
- See Documents Library for information on Bulk Start Quick Signs and more!
Before You Begin
You must be a member of the workspace for which you want to prepare a document to send for signing.Get a Document Signed
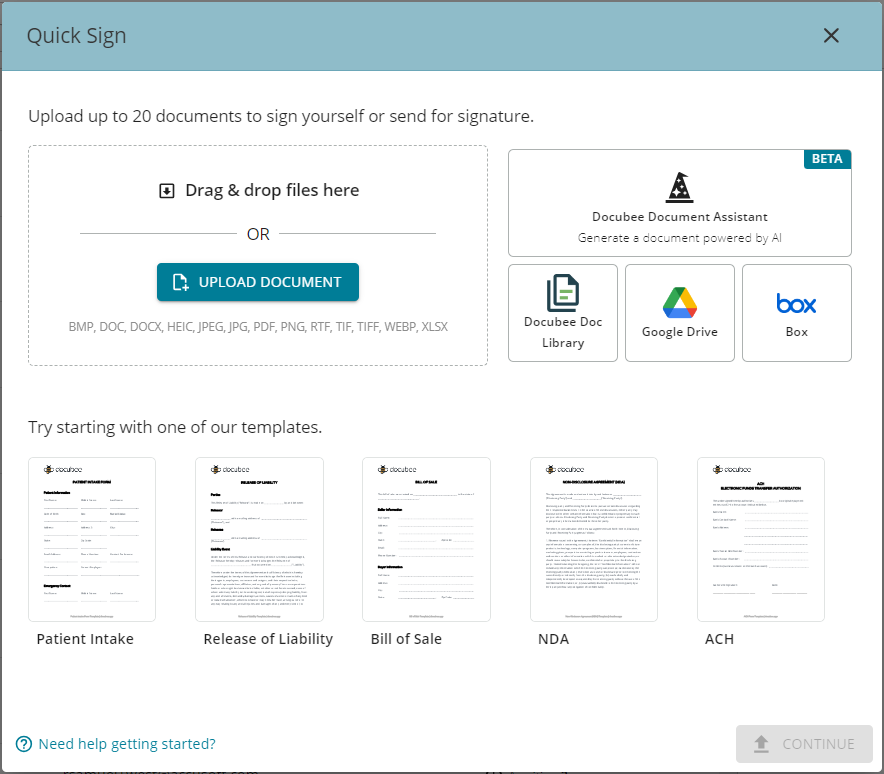
- In the Dashboard, select Get a Document Signed to open the Quick Sign modal.
Note: See Send a New Quick Sign for an alternative way to initiate the process.
 Note: For a tour of this modal, at lower-left corner click (?) Need help getting started?
Upload a Document
- You can either upload a document or select a template. To make it extremely convenient for you to upload documents from various sources, we offer six ways to do it. In the QS modal, click one of these buttons: Note: See Upload a Document (Quick Sign) for more information. Note: You can upload up to 20 documents to sign yourself or send for signature.
- Select the document(s) to upload.
- The selected document(s) are listed on the QS modal as ‘Ready to upload’.
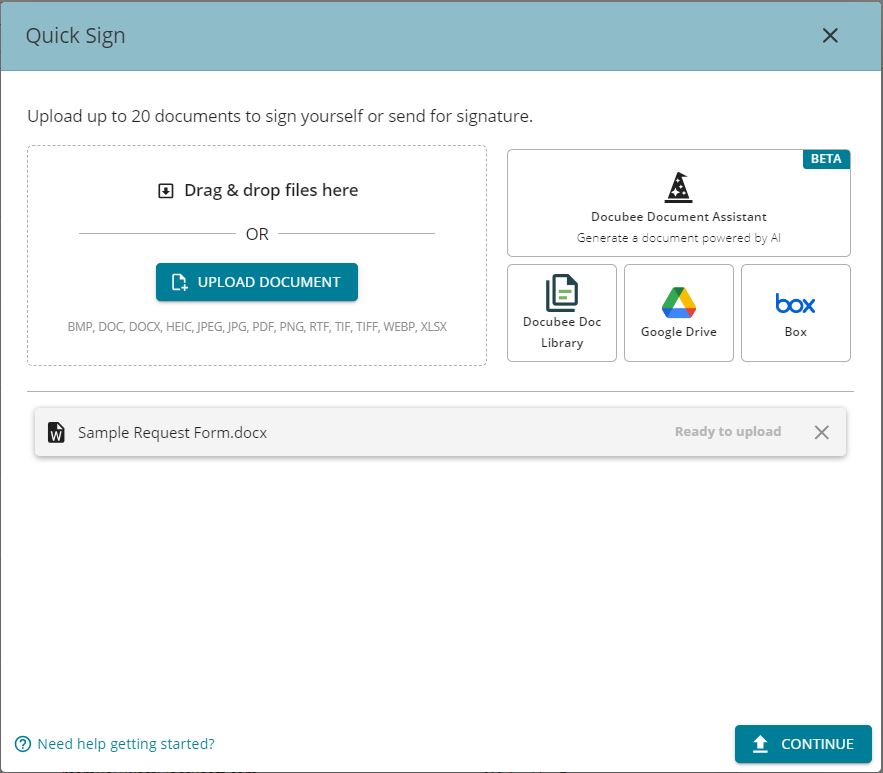
- Click Continue to upload the document(s) and display the Fill or Sign modal.
Supported Formats
BMP, DOC, DOCX, HEIC, JPEG, JPG, PDF, PNG, RTF, TIF, TIFF, WEBP, XLSXFill or Sign
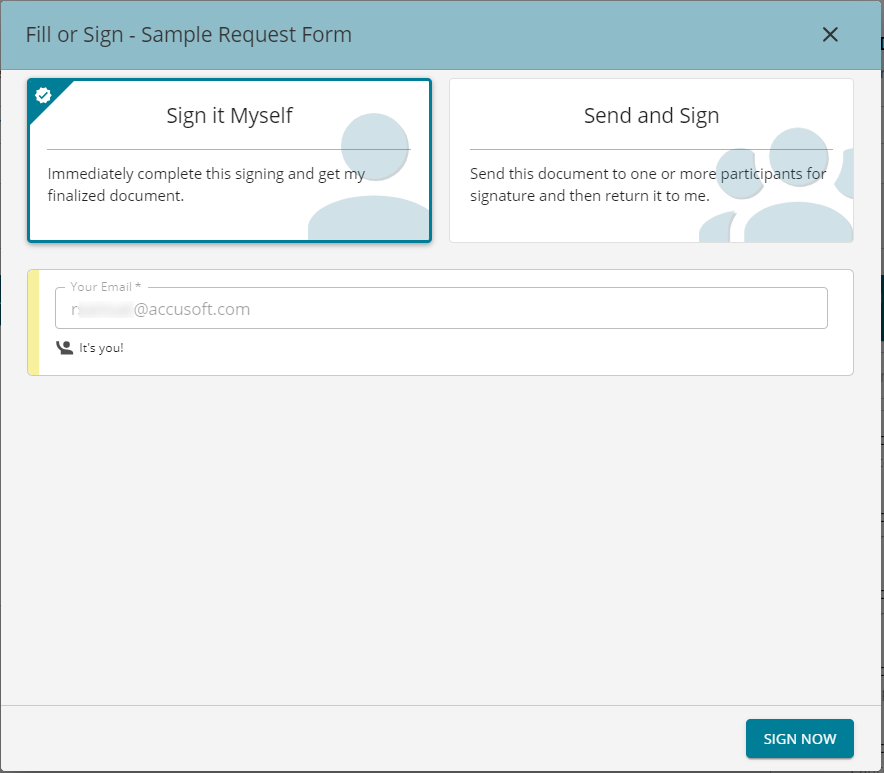
- In the Fill or Sign modal, click one of the following:
- Sign it Myself - You can immediately complete this signing and get your finalized document.
- Send and Sign - You can send this document to one or more participants for signature and then have it returned to you.
Notes: Docubee templates have pre-configured roles and fields making it easy to send the document to participants for signature. If you choose to:
- Send & Sign, you only need to enter an email address for each predefined role and the participants will receive an invitation to fill out and sign the document.
- Sign it Myself, the template will not have the pre-configured fields. You will have to add the required stamps yourself.
Sign it Myself
- In the Fill or Sign modal, select Sign it Myself to immediately sign the document. Click Sign Now at the lower-right.
- The Self Sign modal is displayed.
Use the Hide Thumbnails/Show Thumbnails icon on the toolbar to hide/show the document thumbnail in the left section.
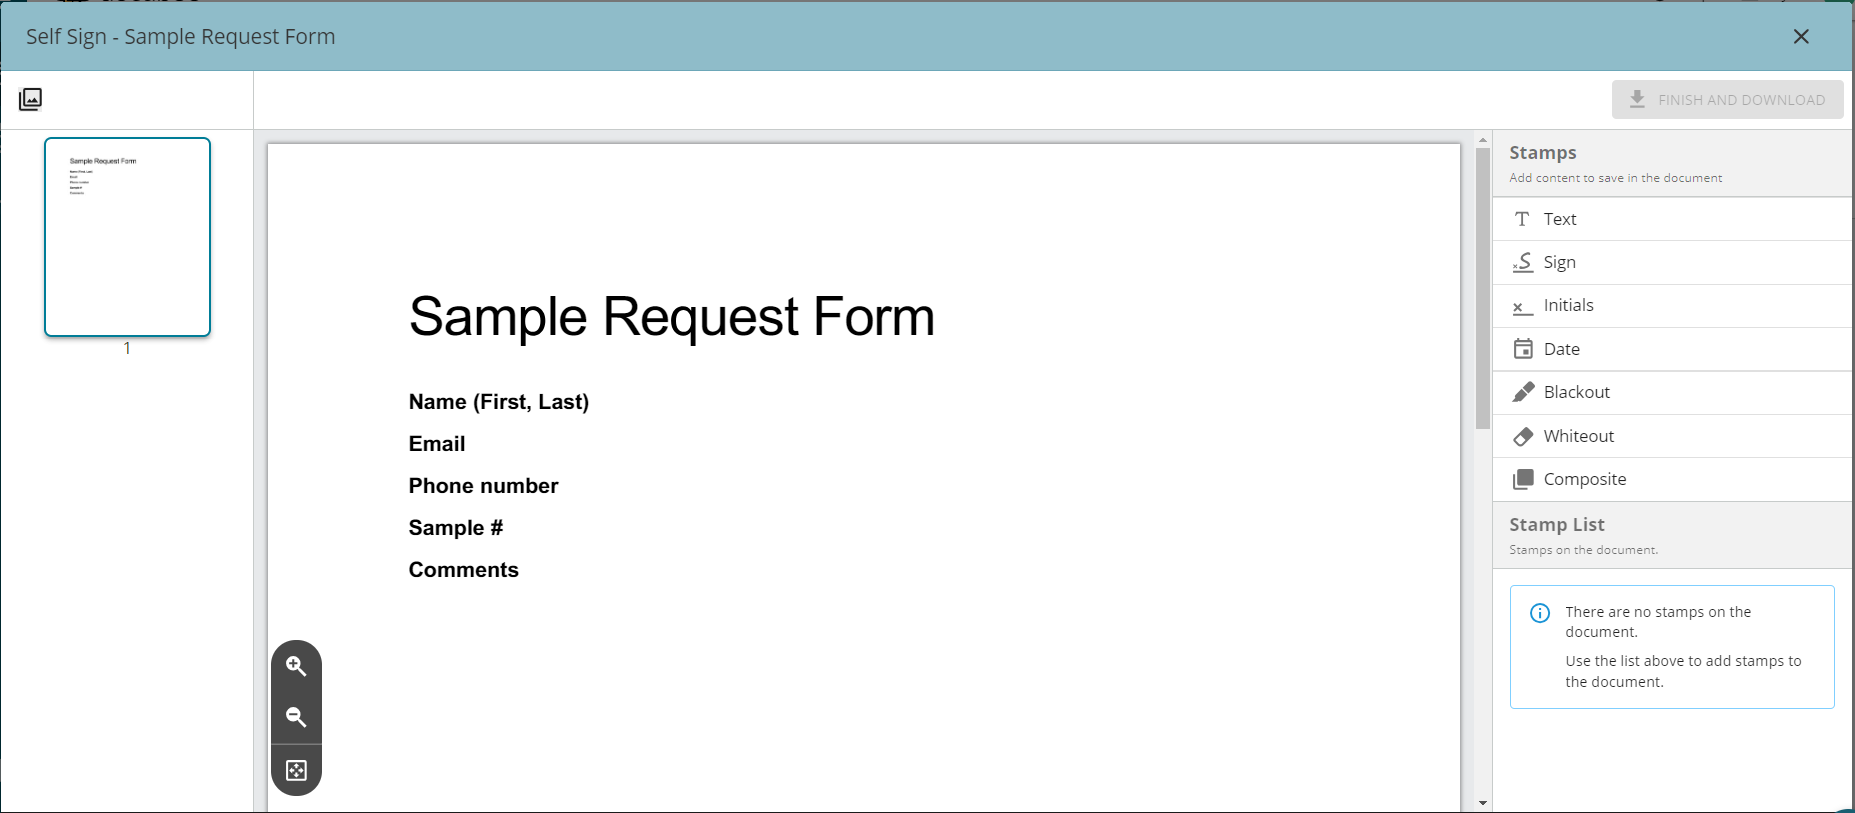 Stamps are available on the right. Use it to stamp your signature, date, custom text, etc. , directly onto the document. Click on the stamp and then click on the document to place it. You can adjust the position by clicking on it and dragging it.
Note: If you uploaded a pre-built Docubee template and chose to sign it yourself, it will not have any pre-configured fields. Use stamps to add fields.
Stamps are available on the right. Use it to stamp your signature, date, custom text, etc. , directly onto the document. Click on the stamp and then click on the document to place it. You can adjust the position by clicking on it and dragging it.
Note: If you uploaded a pre-built Docubee template and chose to sign it yourself, it will not have any pre-configured fields. Use stamps to add fields. - At the upper-right, click Finish and Download. Your content is burned into the document and finalized.
- The Signing Complete modal displays with the message, “Your document is ready!”
- Click Download Now to download the finalized document as a PDF.
- Click the X to close the modal.
Send and Sign (Send for Signature)
Note: Docubee templates have pre-configured roles and fields making it easy to send the document to participants for signature. You only need to enter an email address for each predefined role and the participants will receive an invitation to fill out and sign the document.
-
- In the Fill or Sign modal, select Send and Sign.
- Enter the signer’s Role, Email, and Name. Use the toggle switches to set whether the signer should receive the finalized document(s) and/or attachment(s).
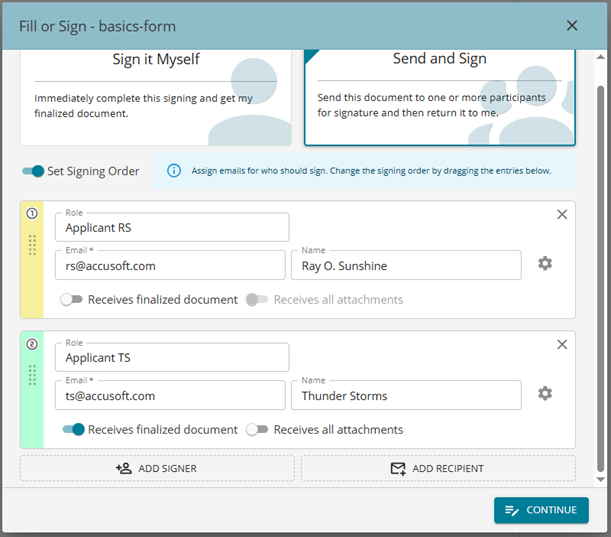 Note: When sending emails from Quick Sign or the Document Library, the signer's name will appear next to their email address, creating a more professional look and helping the recipient to easily identify the signer.
Note: These signer information boxes are color-coded for easy identification. When you turn on the Set Signing Order toggle the order number will be visible in the left color swatch.
Note: When sending emails from Quick Sign or the Document Library, the signer's name will appear next to their email address, creating a more professional look and helping the recipient to easily identify the signer.
Note: These signer information boxes are color-coded for easy identification. When you turn on the Set Signing Order toggle the order number will be visible in the left color swatch. - Add additional signers (up to 20 individual roles for signing) and/or recipients (up to ten), as required.
- You can set the signing order by switching on the toggle for Set Signing Order and then click and drag signers to rearrange in the list. The option will be available after you add a second signer. Note: See more information under Set Signing Order, About Signers, and About Recipients.
- Click Continue to open the Prepare Document modal. See Prepare Document Modal (Quick Sign) for more information.
- You can place fields in the document by either:
- manually drag & drop / place fields on the document. Note: You can choose to prefill Date fields. or
- clicking Scan for Fields to automatically scan the document and place the fields in it.
- In case you have multiple signers, you can assign fields to be completed by each signer.
- Select a field and then select a signer from the Assign to Role dropdown and designate it as required or optional. Roles are color-coded so the color of the field changes to match that of the signer’s role.
- You can place fields in the document by either:
- At the upper-right click Send For Signature.
- In the Finalize document modal, click the Expiration dropdown menu and set your expiration date to one of the available options. For more information see Quick Sign with Expiration Dates. Note: There is also a General Settings dropdown with the option to specify a Process Name. The default process name is “Quick Sign Process”. Enter a descriptive and meaningful process name to better identify the process and distinguish it from others.
- Click Send Now.
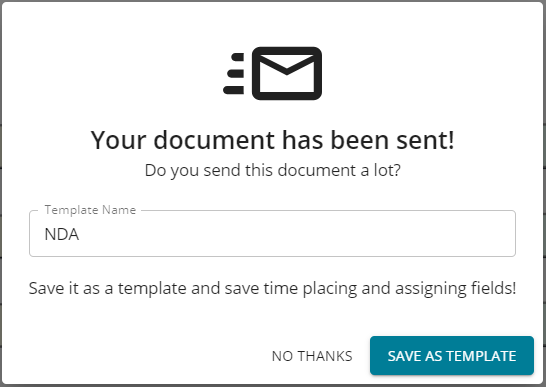
- Your document has been sent! See Save as Template for information on saving frequently used documents.
Save as Template
If you send this document often, you can choose to save it as a template which would save you time assigning fields each time. Enter a name for this template and click Save as Template.
The template will be saved to your Docubee Document library.
Set Signing Order
You can set the signing order by switching on the Set Signing Order toggle in the Fill or Sign modal. The option will be available after you add another signer.- If you do not choose a signing order, then all signers receive the email simultaneously/in parallel and whoever signs first is the first signer. The second signer can see the first signer’s signature, etc.
- If you choose a signing order, only after the first signer has completed signing and submitting the document will the second signer receive an email informing them of a document to sign.
- Use the color swatches to the left of a signing participant box to drag and change the order. Note the number displayed in the color swatch to indicate the signer’s number and order.
About Signers
See The Signer’s Experience (Quick Sign) for more information.- Signers don’t need a Docubee account to access, fill, and sign their document.
- In the Fill or Sign modal:
- You can choose to let them also receive the finalized document by using the toggle switch Receives finalized document.
- You can choose to let them also receive attachments by using the toggle switch Receives all attachments.
Advanced Settings to Configure Signers
Click the gear icon to display the Advanced Settings where you can use the toggle switches to grant/revoke the following:Additional Actions
Collect Payment - Select a payment provider from the dropdown of providers configured for that workspace and set an amount. This will allow the signer to access the payment provider and pay the specified amount. Note: The signed document’s audit trail will also include information on the payment made. Allow signer to decline - Allows a signer to decline signing ensuring that the process keeps moving forward, eliminating delays. Cancel process upon decline - Available to set if Allow signer to decline has been toggled on. Allow signer to delegate - Allows the assigned signature participant to delegate the task to another recipient to keep the process moving forward and avoid delays. Prevent signature save - Does not save the signature the assigned participant uses to sign the document. Remember to set it per participant.Additional Security
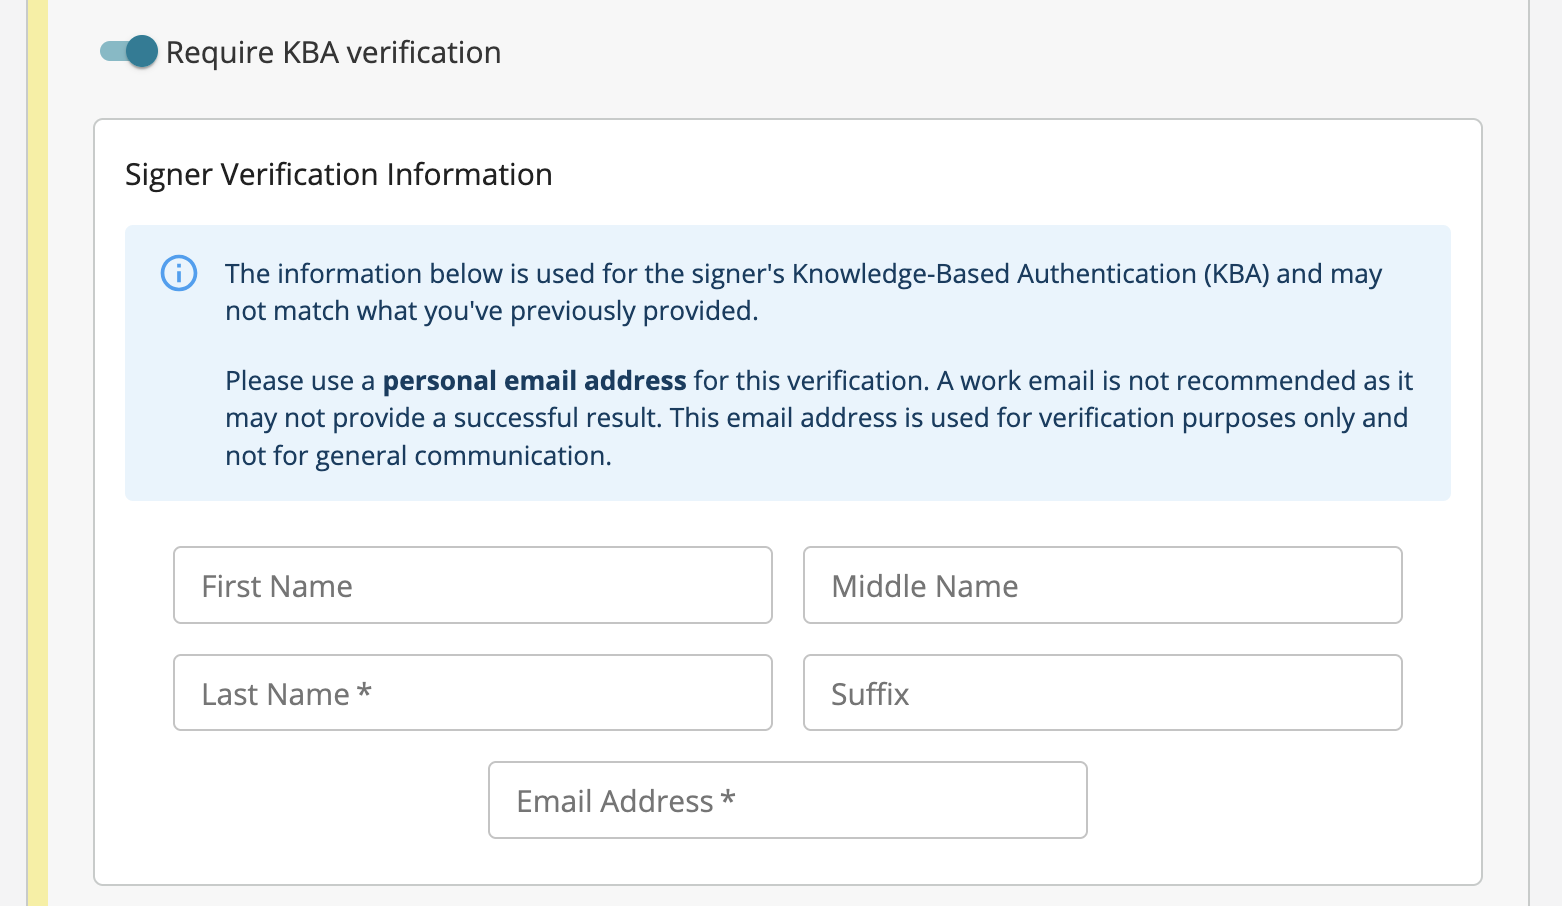
See Knowledge Based Authentication (KBA) Configuration for information on security using the API. Require password - When you toggle this on the Password field is available. Set the password the signer must enter to access the document. Require SMS two-factor - See ‘Set up a Document for Signing with 2FA’ in Two-Factor Authentication for more information. Require KBA verification - When you toggle this on, the signer must complete a knowledge based background check before being given a chance to view the document and complete signing. Contact us for more information.
Customization
Customize notification email - You can customize the content in the email subject and body to suit your requirements. The default email message is used if you do customize it.About Recipients
- Recipients will receive the finalized document after the QS process is completed.
- You can choose to let them also receive attachments by turning on the toggle switch, Receives all attachments, in the Fill or Sign modal.
- After a document has been signed/completed, recipients will receive an email with a Download Signed Document button to download the finalized signed document. This Quick Sign completion email subject will include the document name and the email body will include signer name and email address. Note: The download link expires in two weeks, we recommend you download it as soon as possible.
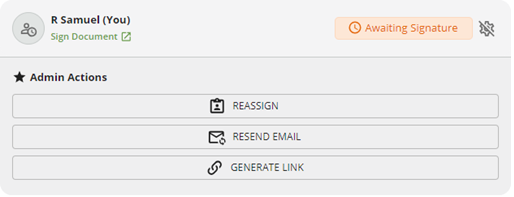
Admin Actions to Manage Recipients
If you are an admin, click on the gear icon (to open/close the Admin Actions accordion) in the Quick Sign Process panel for any recipient to whom you have sent a Quick Sign and do the following:
Reassign - Reassign this document to another recipient,
Resend Email - Resend the email for the current recipient, and/or
Generate Link - Generate a link and send it to a recipient if they are having trouble accessing their email. To generate a link:
- Click the Generate Link button to copy the link to the clipboard. You are informed, ‘Text copied to clipboard’.
- You can paste the link and send it to the recipient.
Prefill Date Fields
When configuring Date fields, you can prefill it in one of the following ways by turning on the option:- Prefill with date acted upon
- Date the signer opens the document.
- Prefill with date sent
- Populates the date the document was sent for signing.
- Prefill with date acted upon plus a specified offset
- Specify the offset by entering the number of Years, Months, and/or Days.
- Prefill with a specific date
- Select the specific date from the date picker.
Track & Manage Your QS Documents
You can view documents you’ve sent for signature on the dashboard in the QS module. All members of a workspace can see all its QS processes.Note: See Customize Your Docubee Dashboard for information on Quick Sign Module Settings and Customize Module.
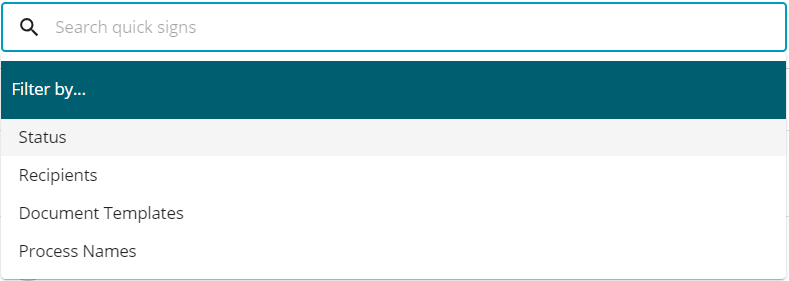
Search and Filter Sent Quick Signs
You can search by entering a query in the search bar or filter the list of sent quick sign documents by clicking in the search bar and selecting Filter by …:- Status (in-progress, complete, canceled and/or expired),
- Recipients (pick from the list of recipients in the dropdown that displays),
- Document Templates (pick from the list in the dropdown that displays), and
- Process Names (pick from the list in the dropdown that displays)
Example filter by status of ‘in-progress’ and document template for ‘sample-doc’:
View Quick Sign Process Details
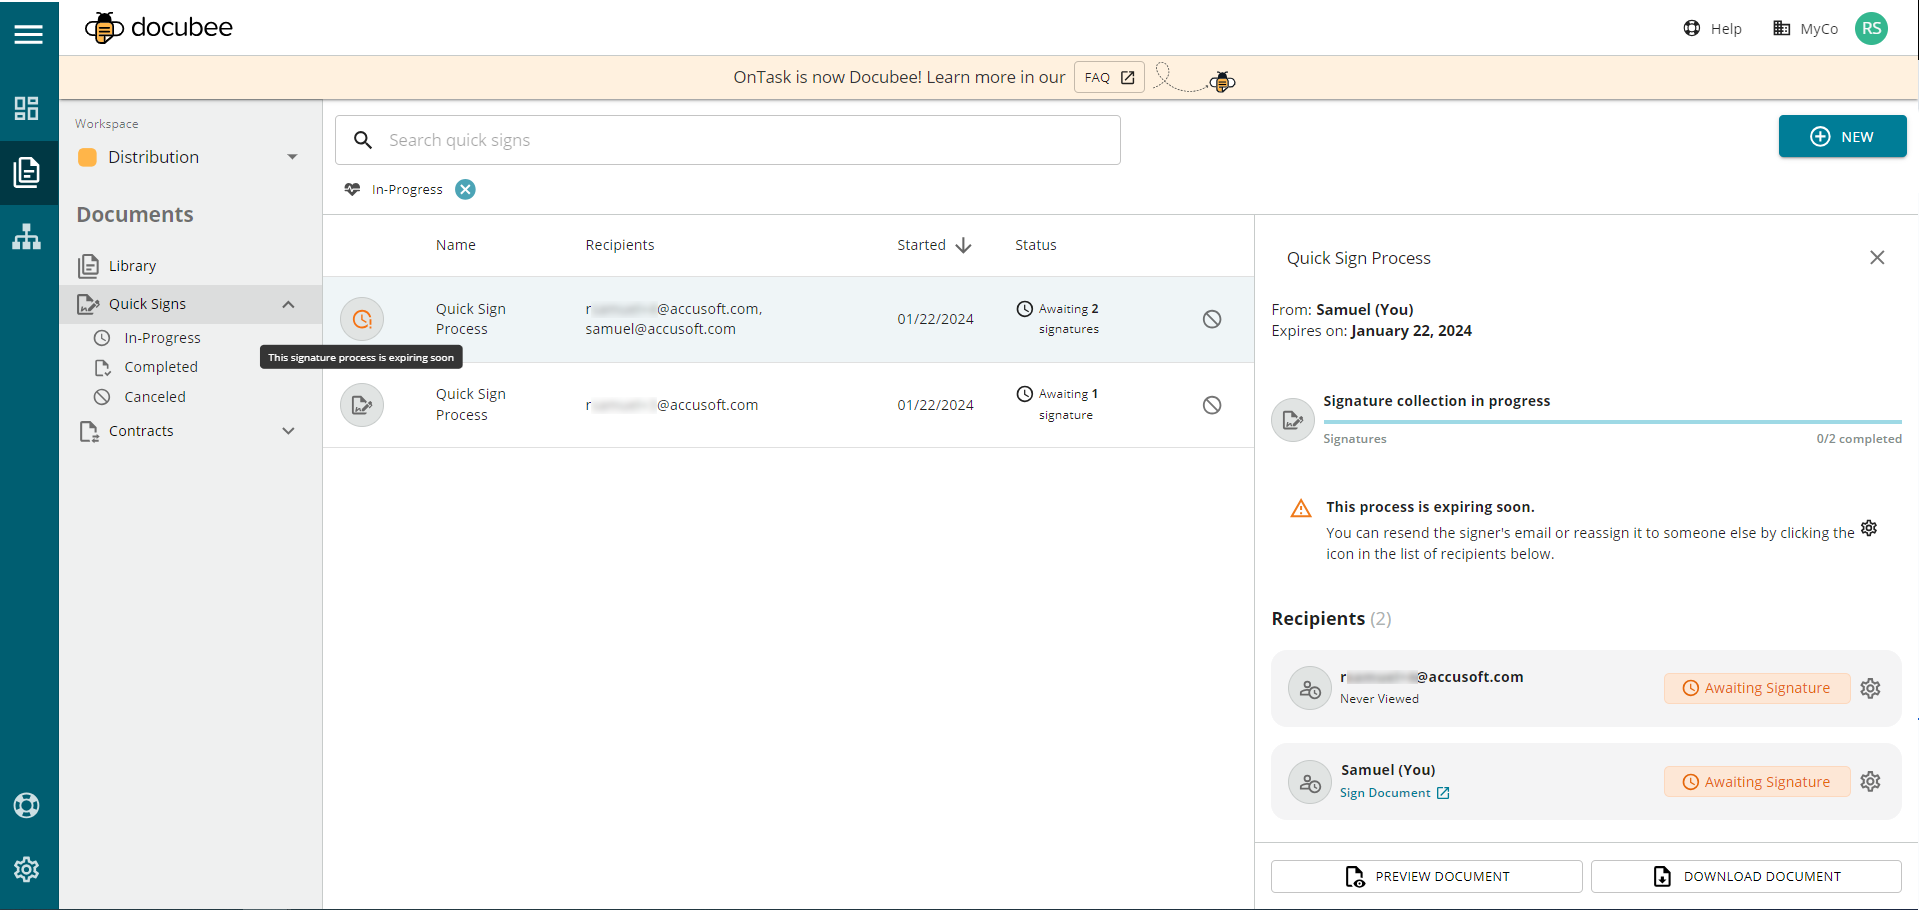
- From the Documents | Quick Sign section, select a QS process to view its details in the right pane. The details include the quick sign process name, who it’s from, when it expires / has expired (if set), the signature collection progress, recipients with their viewing status, and signers with their statuses. Note: One day before expiry the right pane details will include the message, ‘This process is expiring soon.’. Note: If a sign and collect payment QS process has been signed with payment pending, in the In Progress tab the QS will have a status "Awaiting Payment”.
- If you have been provided access to the finalized document, at the bottom right you can click:
- Preview Document to view the document
- Download Document to download it.
Rename Quick Sign Process
- From the Documents | Quick Sign section, select a QS process to view its details in the right pane. Note: The default QS process name is “Quick Sign Process”.
- Hover over the QS process name and click on it to edit.
- Modify the name to suit your requirements. Note: We recommend using meaningful and descriptive names to help identify the QS process. Quick Sign processes are searchable within the Quick Sign dashboard based on the process name and emails of the signers/recipients.
- Click outside the text box to save the name.
Cancel Quick Sign Process
- From the Documents | Quick Sign section, select an in-progress QS process to cancel. Note: When would you need to cancel an in-progress QS process? For instance, you may have initiated the QS but then realized that you don’t need it anymore, or you discovered an error in the document that needs to be corrected before restarting the process.
- Click the Cancel Process icon
 (stop icon) at the right end of the QS process instance.
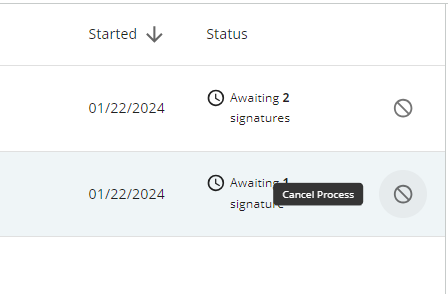
- In the Cancel modal you will be prompted to confirm your intent to cancel the QS process by clicking Cancel Signature Process.
- This QS process will now have a canceled status.
Delete Quick Sign Process
To delete a completed Quick Sign process:- From the Documents | Quick Sign section, select a completed QS process.
- Click the Delete Process icon
 at the right end of the QS process instance.
 - In the Delete modal, confirm your intent to delete the QS process by clicking Delete Signature Process.
Digital Certificates
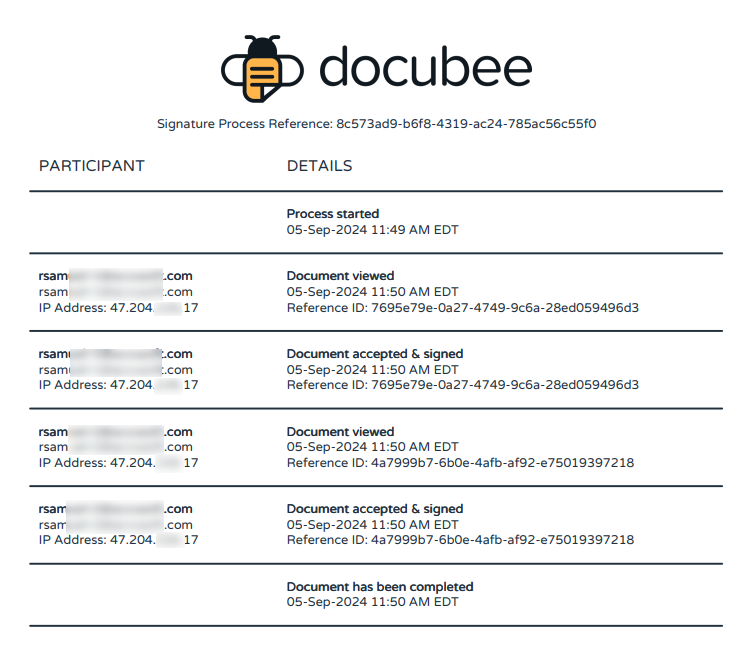
Certificates for digital signatures or initials along with an audit trail are included at the end of each signed document. The digital certificates ensure the authenticity and integrity of the digital signature or initials on the document. The audit trail is a chronological record of the QS process. It includes date and time stamps of when documents were viewed, accepted and signed or initialed, email addresses, and IP address, and when the QS process completed. If the QS process included payment collection, the audit trail will also include information about the payment made, like payment date and time, reference id number, email addresses, and IP address. You must download a document to view the certificate with the audit trail. Here's a sample audit trail:
See the FAQ.
Known Limitations
- You can have a maximum of 20 signers.
- You can upload up to 20 documents.
- Only admins can cancel a QS process.
Related Information
All About Quick Sign (Quick Reference) Create Signature and Initials Manage Integrations for Payment Collection Documents Library Overview of the Documents Section Capturing eSignatures with Docubee (Video) Get Fast eSignatures / Sign PDF Documents (Video) Collect Signatures in Bulk with Docubee (Video) Additional Resources Need more help getting set up? Contact us for assistance from our customer support team or register for Office Hours.Was this article helpful?
That’s Great!
Thank you for your feedback
Sorry! We couldn't be helpful
Thank you for your feedback
Feedback sent
We appreciate your effort and will try to fix the article