New year, same great Docubee (but with some cool new features for you to try out). To kick off 2023, we’ve implemented new features to help support your document needs. We’ve made updates that no longer allow users to skip over required fields, give you more options when uploading documents, and help you tackle those large complicated documents that once haunted your nightmares.
Let’s dive in.


Required Fields will No Longer Accept Blank Spaces
In our newest update, we’ve implemented a new rule which no longer accepts blank spaces as a valid entry in a required field on a digital form or document. An example of how this works: Let’s say that you as a user received a form to fill out that requires you to enter your last name. Previously, you could type a blank space into that required last name field, and the form would accept it as an entry. Now, if a user does this, it will not accept the entry and will instead flag the field to be filled out before the form can be submitted.New Supported Image Type: HEIC Files
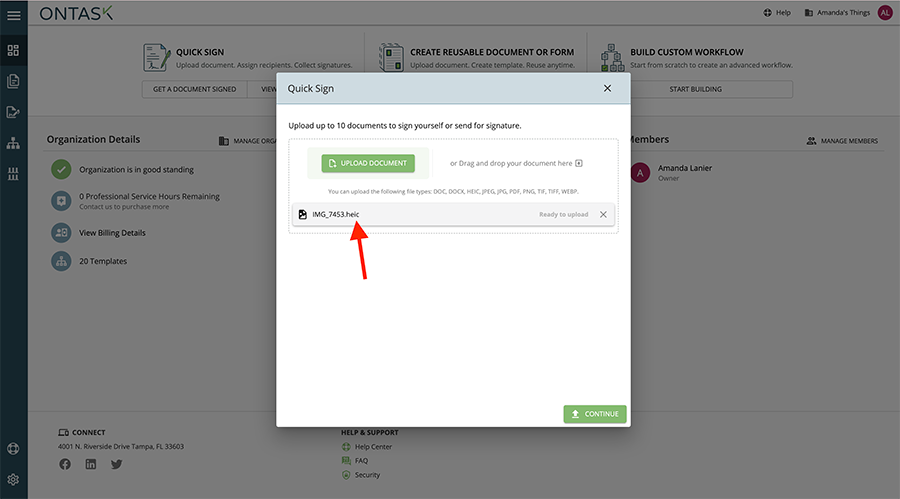
Ever wanted to take a photo from your iPhone and upload it to Docubee for a signature? Well, now you can. HEIC files, the standard image format of photos taken on Apple products, are now supported. It’s simple — all you have to do is take a photo of a document, upload it, place your fields, and send it for signature just as you would any other document.
Fill & Sign Feature Upgrade
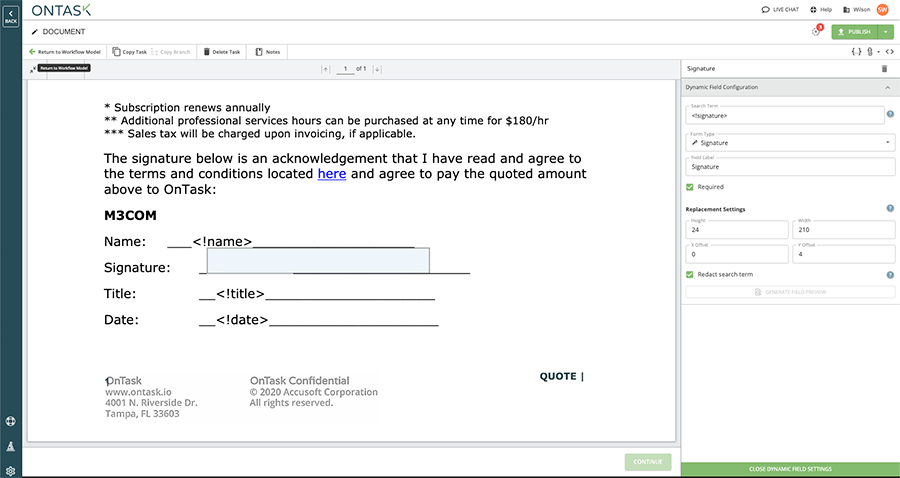
In this new release, we’ve added a new feature to our fill and sign steps that allow you to more easily place fields on long, multi-page documents. Fill and sign steps now support the replacement of placeholder text fields with form fields at time of filling and signing. This feature allows for documents to be created with signature, date, and text box fields that are placeholders so that no matter how long the final document for signing is, fields will be placed in the correct spot for filling and signing. Here’s how it works: On a fill and sign step, add a dynamic field and enter the placeholder text. Docubee will find that text and replace it with a fillable field at the time of signing. To see a preview and adjust the placement of the fillable field, click “Generate Field Preview” and make adjustments.
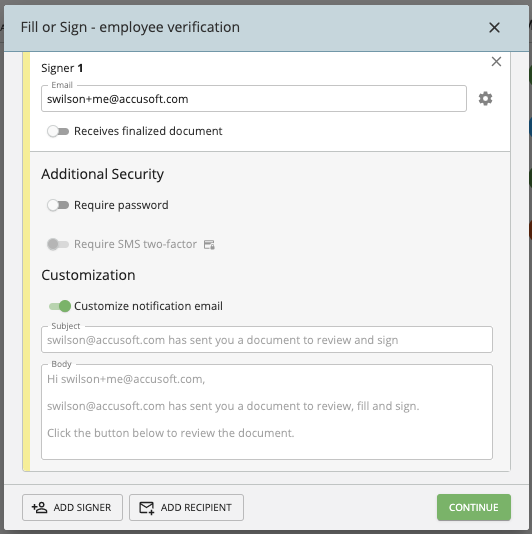
Quick Sign and My Documents Signing Now Allows Senders to Customize the Email Subject and Body for Each Signer
Now, upon sending yourself or others a quick sign document, or sending a document through the My Documents section, you can make changes to the email. Simply click the gear next to where you type your recipient’s email to be dropped into the email editor.
Was this article helpful?
That’s Great!
Thank you for your feedback
Sorry! We couldn't be helpful
Thank you for your feedback
Feedback sent
We appreciate your effort and will try to fix the article