View our Pricing & Plans for a detailed list and comparison of features available in each plan.
Creating documents from scratch is confusing, time-consuming, and can lead to security issues. Whether it’s employee handbooks, contracts, transaction agreements, NDAs, or other documents, let us handle it for you while you focus on growing your business.
Use AI document generation tools for easy, cost-effective contract creation and increased digital document security for your business. AI-generated documents offer accuracy and time-saving benefits.
Create documents effortlessly with Docubee's AI document generator, Docubee Document Assistant. Simply enter a prompt and your document is instantly generated. Signatures and other useful data can then be easily collected from clients using the rest of Docubee's system.
How Does Docubee’s AI Document Generator Work?
Docubee Document Assistant uses AI to generate a document based on provided prompts. Our tool is powered by a private instance of OpenAI, ensuring your information and prompts are kept safe and secure.
Note: Docubee does not use public instances of AI technology so any information or prompts you enter are safe and never shared.
Our AI document generation feature seamlessly integrates with Quick Sign, enabling you to generate an editable document or document packet, place fields, and collect signatures all in one place.
Docubee simplifies document creation for you!
Before You Begin
If you don’t have a Docubee account, you can try the AI Document Generator by clicking this link.Use the Docubee Document Assistant
Use the Docubee Document Assistant to generate a document powered by AI for your QS process or to add to your Docubee Library. Here’s a summary of the steps:- Access the Docubee Document Assistant
- Enter a prompt to generate a editable document
- Edit the AI-generated document (optional)
- Upload the document via Quick Sign
- Prepare the document with signature and other fields
- Send the document for signature
- Create a template if you will use the document often (optional)
- On your Docubee dashboard, click Get a Document Signed.
- In the Quick Sign modal, click the Docubee Document Assistant to get started with AI document generation.
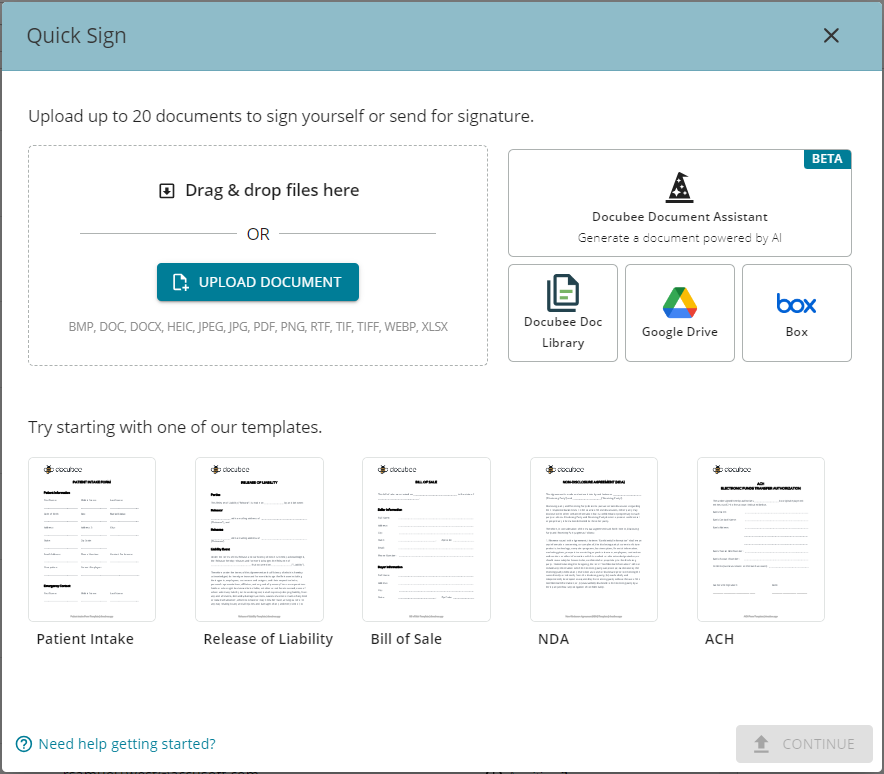
- In the Docubee Document Assistant modal:
- Enter a document name.
- Enter a prompt. Our AI document generator comes prefilled with the phrase “Generate me a document that…” and you fill in the rest.
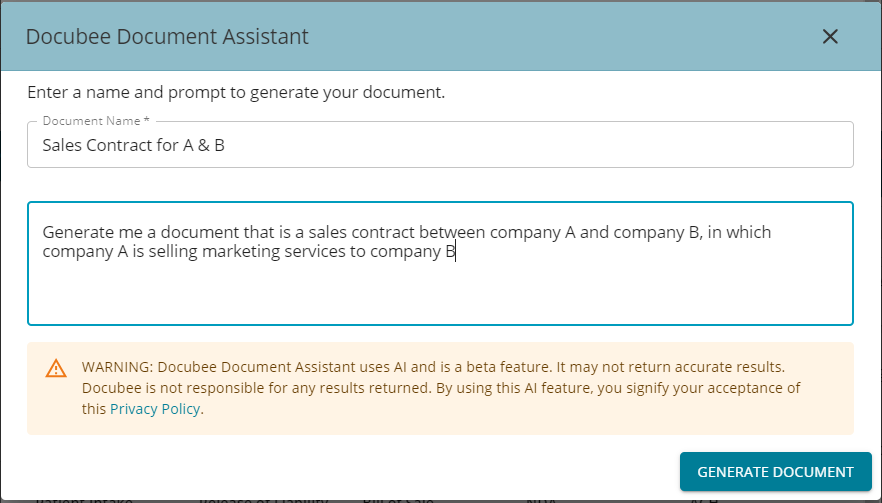 Note: Adding in more details or parameters into your prompt will help the AI generator create a more helpful document for you to use, so be specific.
For example, if you’d like to generate a contract between two businesses for the sales of services, you could enter something like, “Generate me a document that is a sales contract between company A and company B, in which company A is selling marketing services to company B”.
Note: Adding in more details or parameters into your prompt will help the AI generator create a more helpful document for you to use, so be specific.
For example, if you’d like to generate a contract between two businesses for the sales of services, you could enter something like, “Generate me a document that is a sales contract between company A and company B, in which company A is selling marketing services to company B”. - Click Generate Document.
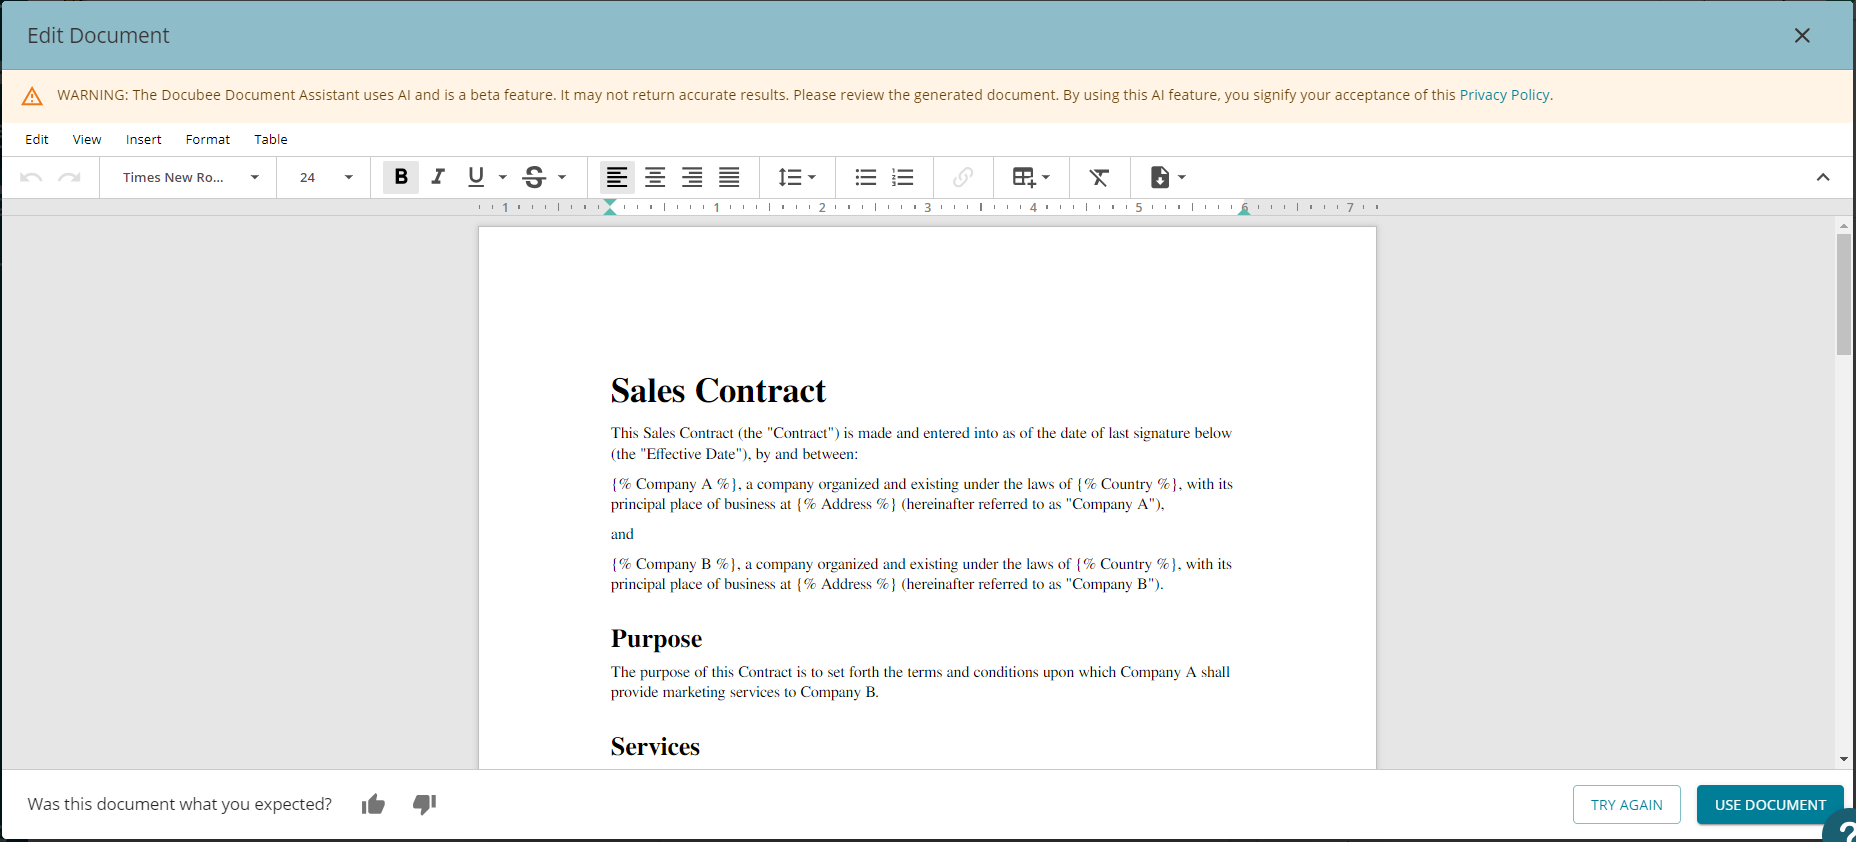
- Docubee will examine your summary prompt, the AI will generate your document based on the terms you put into the prompt, and you will be led to the document editor allowing you to modify the AI-generated document. Note: See Placeholder Prompts.
- In the Edit Document modal, you can add information, modify formatting, and make necessary edits to the AI-generated document. Once complete, click the Use Document button at the lower-right corner to return to the Quick Sign modal.
Note: If the document is not up to your expectations, click the Try Again button at the lower-right corner to re-generate your document.
- In the Quick Sign modal:
- Your document is ready to upload to Docubee and you can choose the workspace to which it should be deployed from the Select an available workspace to assign this document dropdown. Note: Generate or attach up to 20 documents in a single send to create a packet/envelope.
- When all the documents for which you’d like to collect signatures are ready for uploading, click the Continue button.
- In the Fill or Sign modal, select either Sign it Myself or Send and Sign.
- For this example, we’ll choose Send and Sign. See Quick Sign | Send and Sign for more information.
- Since the document we’ve created is a contract, we will add two signers.
- Click the + Add Signer button to add additional participants. Note: For a QS process, you can have a maximum of 20 signers and multiple recipients to receive final copies of the signed document.
- After adding all your signers and recipients, click the Continue button.
- In the Fill or Sign modal you designated who will be signing, in the Prepare Document modal you can choose where they will be signing. See Prepare Document Modal for more information.
- The easiest way to get this done is to have Docubee scan your document for fields. In the Prepare Document modal, simply click the Scan for Fields button as shown below, and Docubee will automatically place signature and date fields. Docubee will assign all tasks to the first signer listed by default.
- Re-assign fields by clicking on the field and selecting the new role to which it should be assigned.
- Rearrange placed fields by dragging them to new locations on your document.
- Alternatively, you can manually place fields on your document.
- To manually place a field, select the field from the top menu and drag it to the desired location on your document.
- Complete your document by clicking the Send for Signature button in the upper- right corner.
- The easiest way to get this done is to have Docubee scan your document for fields. In the Prepare Document modal, simply click the Scan for Fields button as shown below, and Docubee will automatically place signature and date fields. Docubee will assign all tasks to the first signer listed by default.
- In the Finalize Document modal, you can choose to:
- review your fields by clicking Review My Fields Note: Clicking Review My Fields returns you to the Prepare Document modal where you can review and modify your fields.
- send the document by clicking Send Now and start collecting signatures.
- If you will be frequently using this document with the fields placed on it, consider creating a template from the AI document you created. Enter a name for the template and click Save as Template. See Quick Sign | Save as Template for information.
Placeholder Prompts
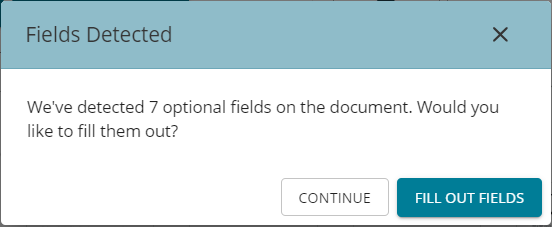
The placeholder prompt ability will automatically detect fields on your generated document and prompt you to fill it. It is optional to fill it at this time. This is useful for documents where you want to add some information like company name, disclosing and receiving party, that will be embedded into your document before sending it to the user to sign. This ensures the accurate information is included in your contract and cannot be changed once it is sent for review and signature. After clicking Generate Document, depending on the document generated, you may encounter the Fields Detected modal.
- Click Continue to proceed to the document.
- Click Fill Out Fields to enter values for the fields in the next Fields Detected modal, then click Continue to Document.
- In the Edit Document modal, you will see your specified values embedded in the document. You can further edit it as necessary.
Known Limitations
- The Docubee Document Assistant uses AI and is a beta feature. Therefore, it may not always return accurate, ideal results. Please make sure to check the Document Assistant’s work.
Related Information
All About Quick Sign (Quick Reference) Overview of the Documents Section Send a Document Packet for Signature Additional Resources Need more help getting set up? Contact us for assistance from our customer support team or register for Office Hours.Was this article helpful?
That’s Great!
Thank you for your feedback
Sorry! We couldn't be helpful
Thank you for your feedback
Feedback sent
We appreciate your effort and will try to fix the article