We offer several ways to upload a document for Quick Sign (QS). You can upload up to 20 documents to sign yourself or send for signature.
- In the QS modal, select your preferred method of uploading a document by clicking one these buttons:
Drag & Drop / Upload Document
Select and upload a document, or drag and drop it into the QS modal.- Do one of the following:
- Drag the document from your folder and drop it onto the QS modal.
- Click Upload Document, select the document in the dialog, and click Open.
- The document(s) is added to the QS modal as ‘Ready to upload’
- Click Continue to proceed to the Fill or Sign modal.
Docubee Document Assistant
Generate a document powered by AI.- In the QS modal, click the Docubee Document Assistant button.

- Enter the Document Name and a prompt for the AI generator describing what you want the form to be about and include, etc. Click Generate Document.
- Based on your prompt, a form is created with suitable fields and is displayed as a placeholder template in the Fields Detected modal. Any data values you enter for the fields here will be used in preparing the document.
Note: It is optional to enter values for the fields at this point.
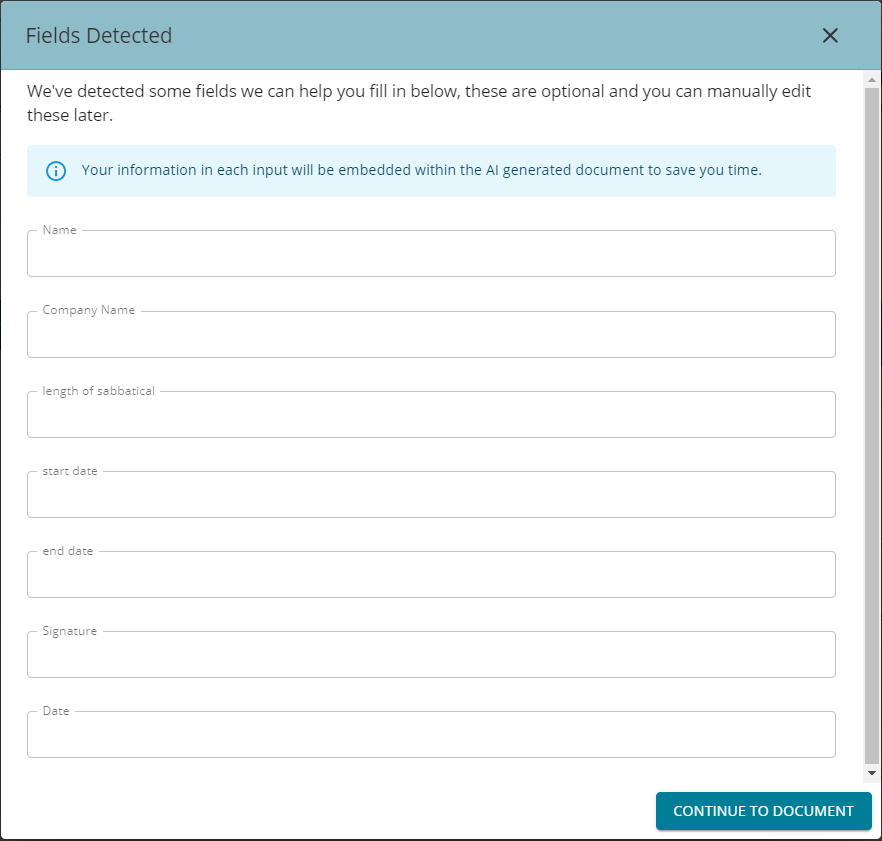
- Click Continue to Document.
- The document is generated with the fields that were detected and data you may have entered. It displays in the Edit Document modal and you can edit it to suit your requirements.
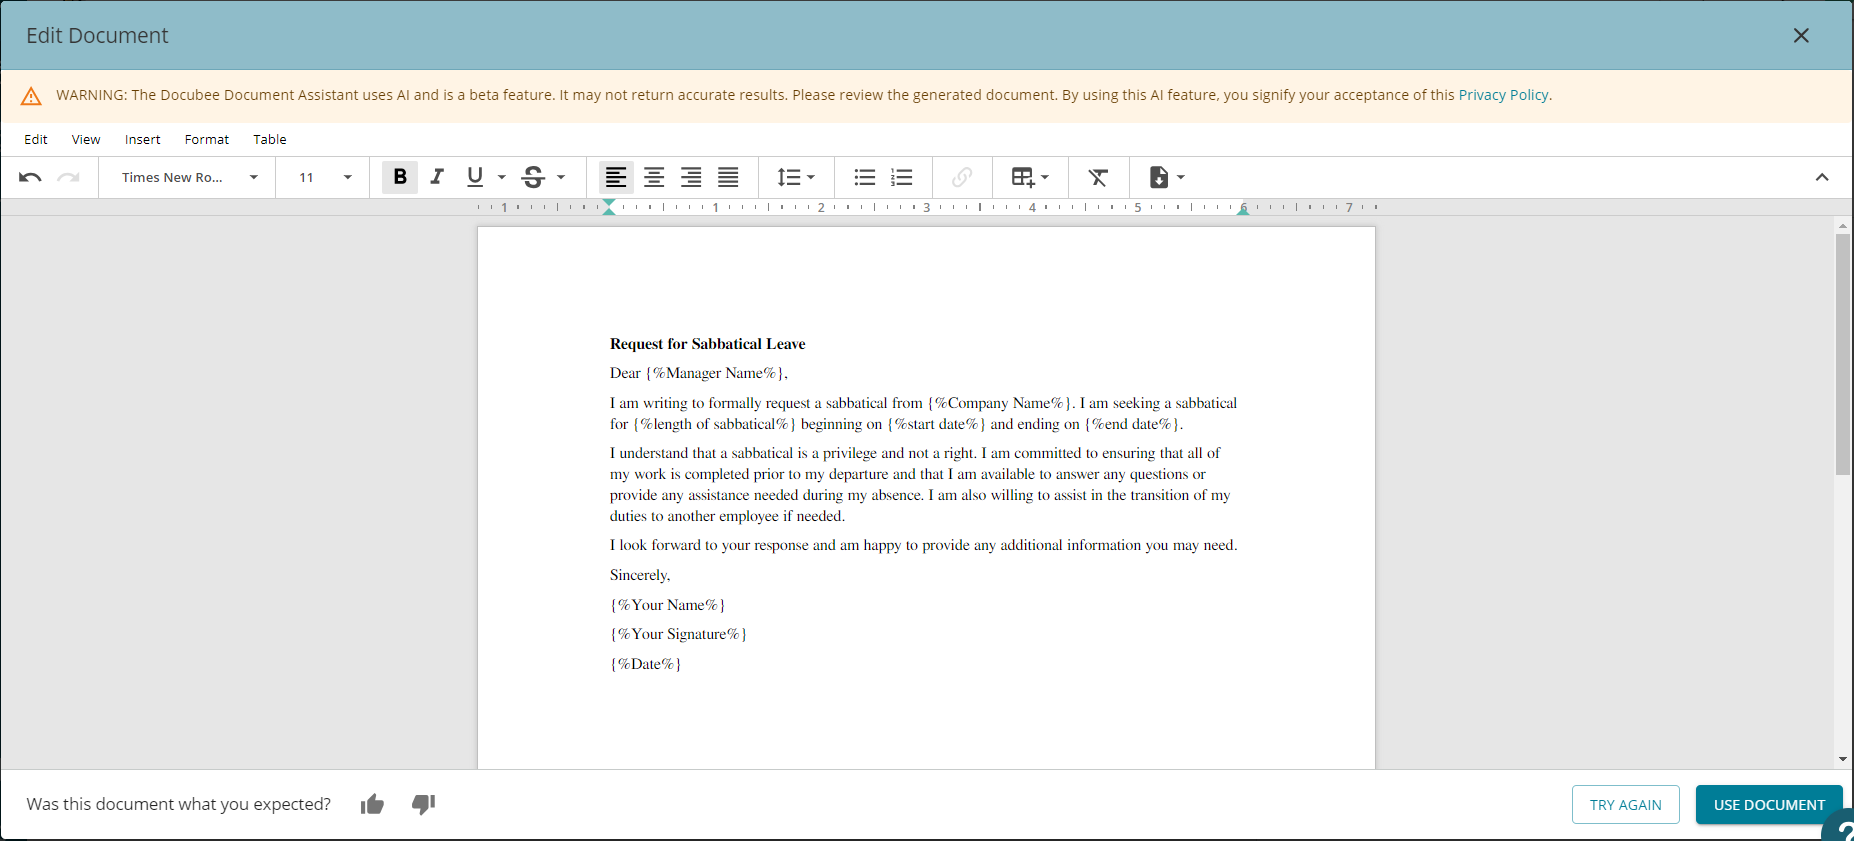
- If it does not meet your approval, click Try Again.
- Click Use Document to add it to the QS modal as ‘Ready to upload’.
- Click Continue to proceed to the Fill or Sign modal.
Docubee Doc Library
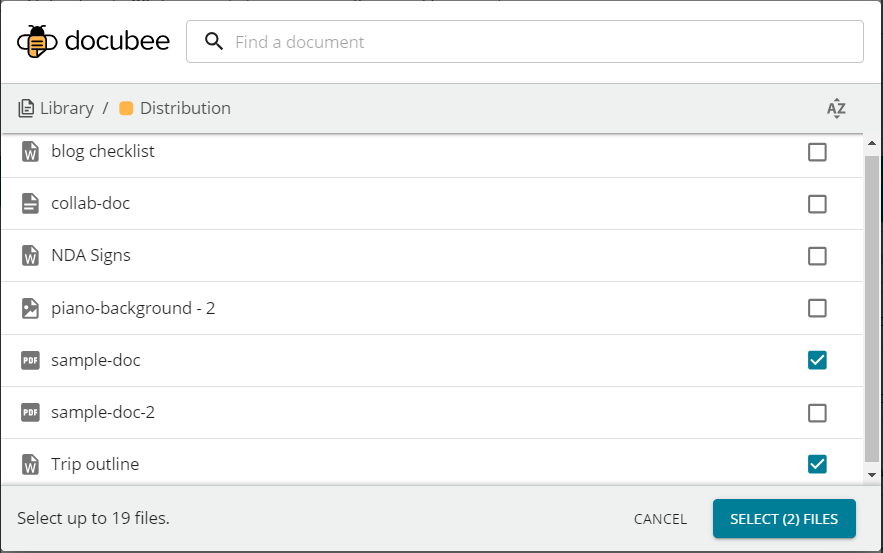
Select a document from your Documents Library.- Click the Docubee Doc Library button in the QS modal to see the list of documents available in the document library for that workspace.
- Select the document(s) to upload.
 Note: You can select up to 20 files for quick signing.
 - Click Select (if one file is selected)/Select (#) Files (if a number of files are selected).
- The files are listed in the QS modal as ‘Ready to upload’.
- Click Continue to proceed to the Fill or Sign modal.
Google Drive
Import documents from Google Drive to Docubee.- In the QS modal click Google Drive.
- If you have not already integrated / granted access to your Google Drive:
- In the Sign In authentication window select your google account to use with Docubee. See How to Import Documents from Google Drive for more information.
- Docubee needs to access your Google account, click Allow to grant access.
- The Select a FIle modal displays the files in your Google Drive.
- Select the document you want to upload and click Select.
- The document is listed in the QS modal as ‘Ready to upload’.
- Click Continue to proceed to the Fill or Sign modal.
Box
Import a document from Box (box.com) to Docubee.- In the QS modal click the Box button
- In the Box Customer Log In authentication window enter your email and password to connect to your account.
- Docubee launches a Box document picker for you to select your document to upload. See How to Import from Box.com for more information.
- The document is listed in the QS modal as ‘Ready to upload’.
- Click Continue to proceed to the Fill or Sign modal.
Note: If you have frequently used documents in Box that you need in Docubee, you can import those Box documents to Docubee’s Documents Library section so you don’t have to log in to Box each time you need a document exported.
Docubee Templates
Do you prefer to start with a pre-built document template? We have that option, too! Select a template that meets your specifications as a starting point and modify it to suit your specific requirements. Docubee templates have pre-configured roles and fields making it easy to send the document to participants for signature. If you choose to:- Send & Sign, you only need to enter an email address for each predefined role and the participants will receive an invitation to fill out and sign the document.
- Sign it Myself, the template will not have the pre-configured fields. You will have to add the required stamps yourself.
Select Template
- Select a template on the QS modal.
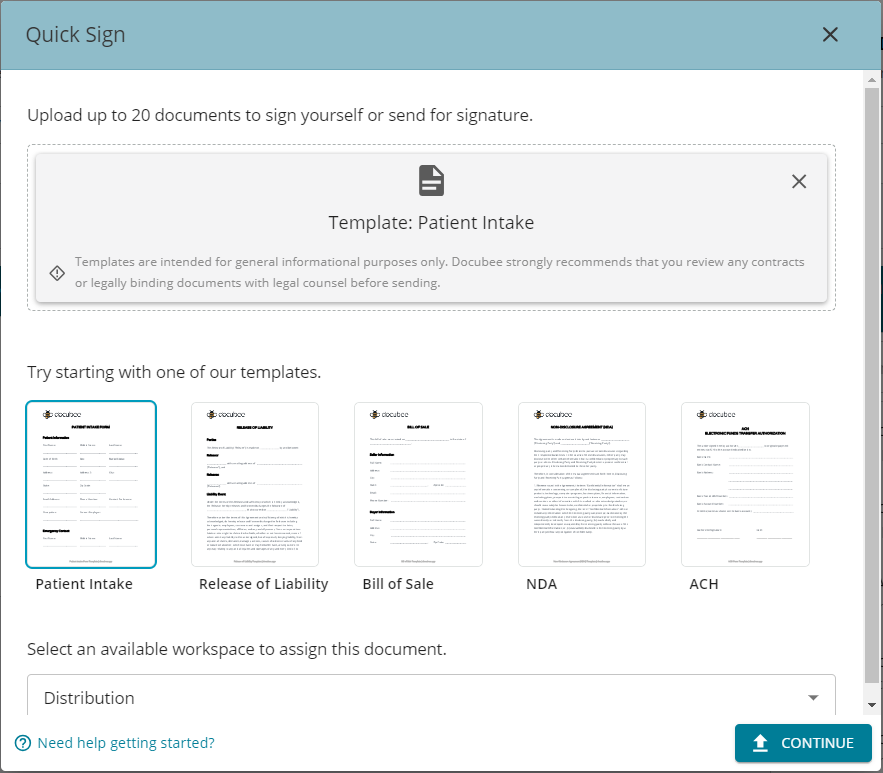
- Click Continue to proceed to the Fill or Sign modal. See Quick Sign for more information on Fill or Sign.
Related Information
All About Quick Sign (Quick Reference) Import Documents from Google Drive Import from Box.com Additional Resources Need more help getting set up? Contact us for assistance from our customer support team or register for Office Hours.Was this article helpful?
That’s Great!
Thank you for your feedback
Sorry! We couldn't be helpful
Thank you for your feedback
Feedback sent
We appreciate your effort and will try to fix the article