View our Pricing & Plans for a detailed list and comparison of features available in each plan.
KBA is a security measure to identify and authenticate a user before giving access to information or documents. KBA transactions are tracked on the Billing page (in Settings).
Before You Begin
You need to prepare the workspace and follow some general guidelines:- Organization plan - Your organization must be on a plan that supports KBA.
- Our Sales or Customer Success teams will assign the KBA flag.
- Workspace Required Token Permission - The workspace (belonging to the above organization) must have one or more API access tokens generated that have the following permissions:
- Start Quick Sign
- KBA is only currently available for the Signature API.
Configure KBA
The Signature API has a new security option, KBA, that can be configured for each signer. You can add the configuration option in the `signers[n].security` object to enable KBA for signer ‘n’ (For details, see securityObject and kbaObject under Start Signature Process.):{
"kba": {
"maxAttempts"?: 3,
"firstName"?: "John",
"middleName"?: "Fitzgerald",
"lastName": "Doe",
"suffix"?: "JR",
"email": "JohnDoe@example.com"
}
This will return the existing standard Signature process response.
Prepare and Send a Document for Signing with KBA
After you have configured your organization for KBA, you can include/use it when sending a document for signing to verify your signer before giving them access to sign your document. Use the following as guidelines to perform this using the API:- Upload the document you want to send for signing.
- Place the fields on your document.
- Start the signature process.
Your Signer’s Experience
The signer will:- Receive an email informing them they have a document awaiting signature.
- Fill a form to identify themself.
- The intended signer (as indicated in the `signers[n].contactMethod`, NOT in the `signers[n].security` object) will first see the following prior to signing:
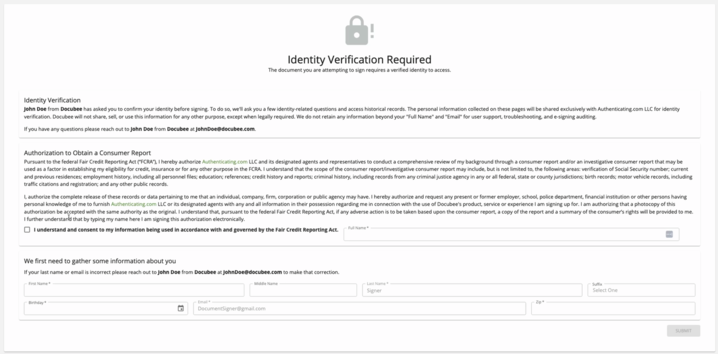
- The intended signer (as indicated in the `signers[n].contactMethod`, NOT in the `signers[n].security` object) will first see the following prior to signing:
- After their information is identified / matched, they can answer a timed five question quiz of their history to get authenticated.
Note: If a match is not found, they are prompted for more identifying information about themself, such as their phone, address, and SSN. Once they are identified, they can answer a timed five question quiz.
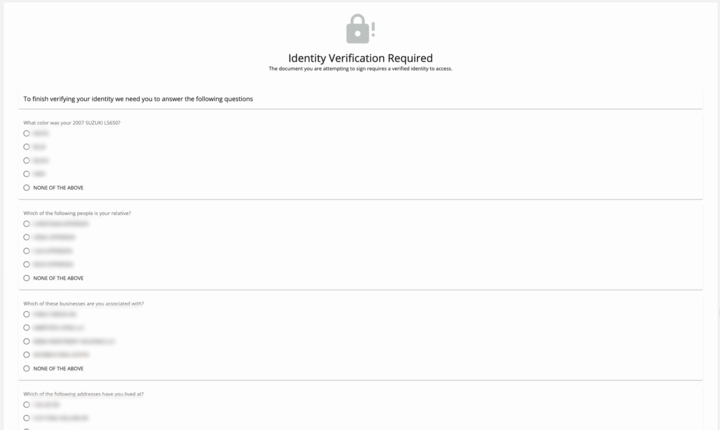
- If they successfully complete the quiz in the set time, they are authenticated and the document is provided to them for signing.
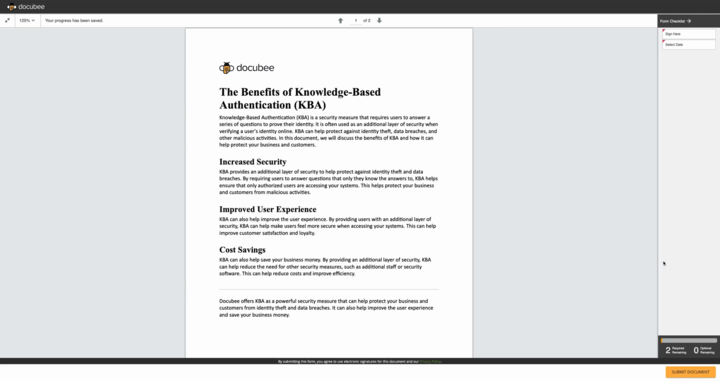
Sample of a document to sign with the signature field at the top right:
- If they are unsuccessful in completing the quiz in the allotted time or fail to answer the questions accurately, they can retake the quiz till they succeed or exhaust the maximum number of attempts.
- If they successfully complete the quiz in the set time, they are authenticated and the document is provided to them for signing.
Sample of a document to sign with the signature field at the top right:
Related Information
Additional Resources Need more help getting set up? Contact us for assistance from our customer support team or register for Office Hours.Was this article helpful?
That’s Great!
Thank you for your feedback
Sorry! We couldn't be helpful
Thank you for your feedback
Feedback sent
We appreciate your effort and will try to fix the article