View our Pricing & Plans for a detailed list and comparison of features available in each plan.
Accounts plans that include this level of customization can create custom, human readable URLs for their workflows. These custom URLs can be used to describe your workflow and provide a more user-friendly experience when sending to participants.
About the Workflow URL Structure
All workflows continue to have a static canonical URL containing the unique template ID. Here is an example of how that looks:https://docubee.app/workflow/98f74ad0-f5e6-4be7-a5b7-b692d7d1b71chttps://docubee.app/w/YourOrganization/YourWorkflowTemplateOrganization URL
Each organization can have a custom string that can be used for each of its custom workflow URLs.- This can be set under General Organization Settings as Organization URL.
- This is a unique string across all of Docubee.
- Any change to this will immediately update the custom URL for every workflow in the organization.
Note: Old URLs will no longer be valid.
Workflow URL
Each workflow can have a custom string that becomes part of a full human-readable URL that can be shared publicly to access the initial form.- This can be set in the workflow builder under Workflow Settings in the the Sharing tab as Workflow URL. Note: Turn on Customize Shared URL to enter the Workflow URL.
- These workflow URL values must be unique to your organization.
Note: When changing a workflow URL, the previous URL will no longer be valid. If a workflow is currently shared with a custom URL, then any changes will be updated immediately, and the old link will no longer work.
Customize Your URLs
Customizing your URL is simple. Docubee will automatically apply your organization name to the first part of your custom URL as shown below:https://docubee.app/w/YourOrganization/98f74ad0-f5e6-4be7-a5b7-b692d7d1b71c- To customize the tail of your URL, navigate to the workflow you’d like to run and hit the
 Run button.
 - Navigate to the Share tab and click on settings menu.
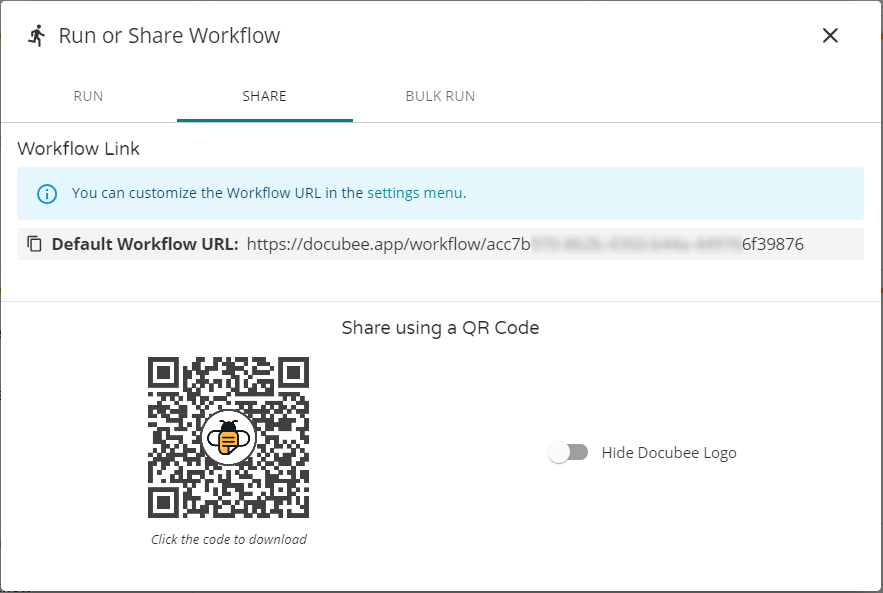
- This will take you to your workflow settings. Here, toggle on the Customize Shared URL button.
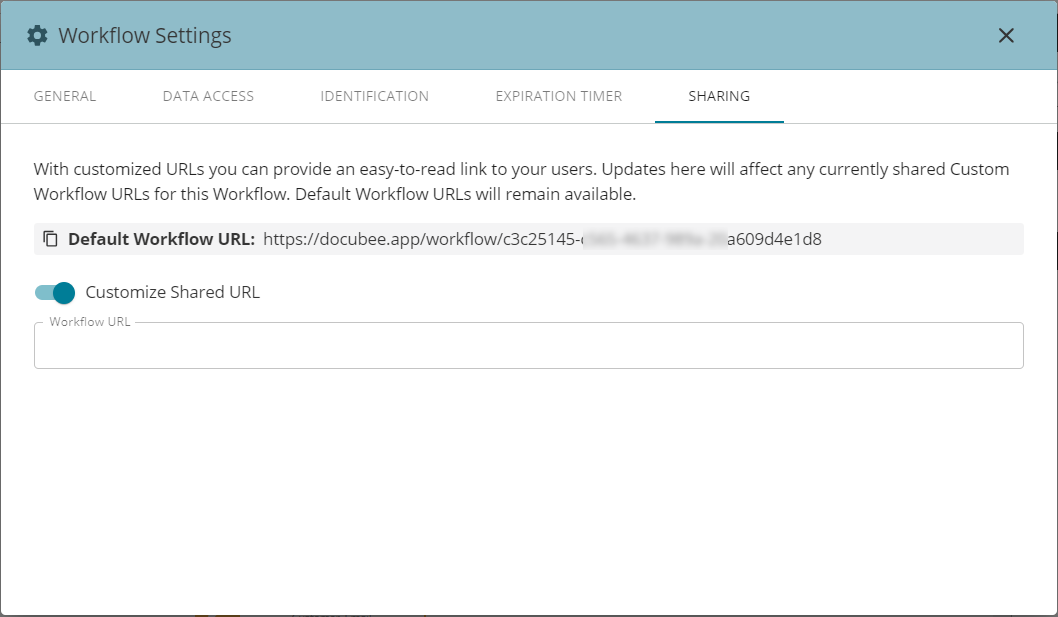
- Enter the name you’d like to use for your custom URL. We recommend naming this something that reflects the kind of form you are sending.

Related Information
All About Workflows (Quick Reference) Need more help getting set up? Contact us for assistance from our customer support team or register for Office Hours.Was this article helpful?
That’s Great!
Thank you for your feedback
Sorry! We couldn't be helpful
Thank you for your feedback
Feedback sent
We appreciate your effort and will try to fix the article